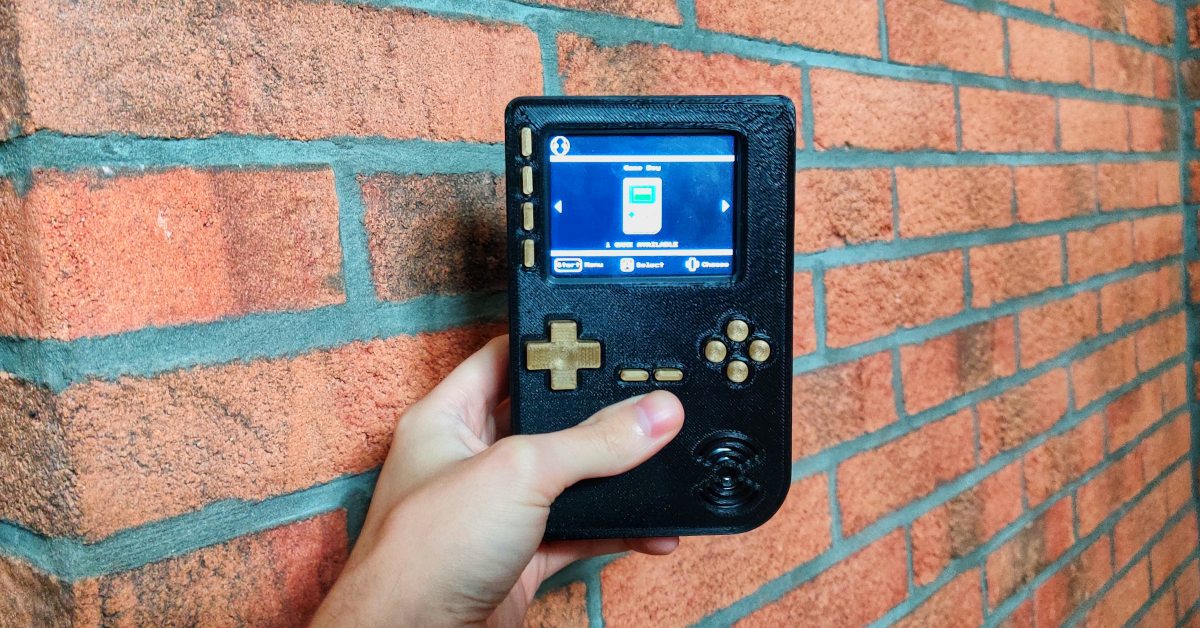
PiGrrl 2 - My PiDay 2021 Project
March 14th was PiDay, the ideal excuse to work on a hardware project over the weekend! It has been a while since I’ve done one, and since I recently acquired a 3D printer, I wanted to use it for something more than printing boats and cubes! I stumbled upon the PiGrrl kit on Adafruit’s website. A kit I’ve wanted to build for a long time but with my 3D printer, I finally exhausted all my excuses not the buy it.
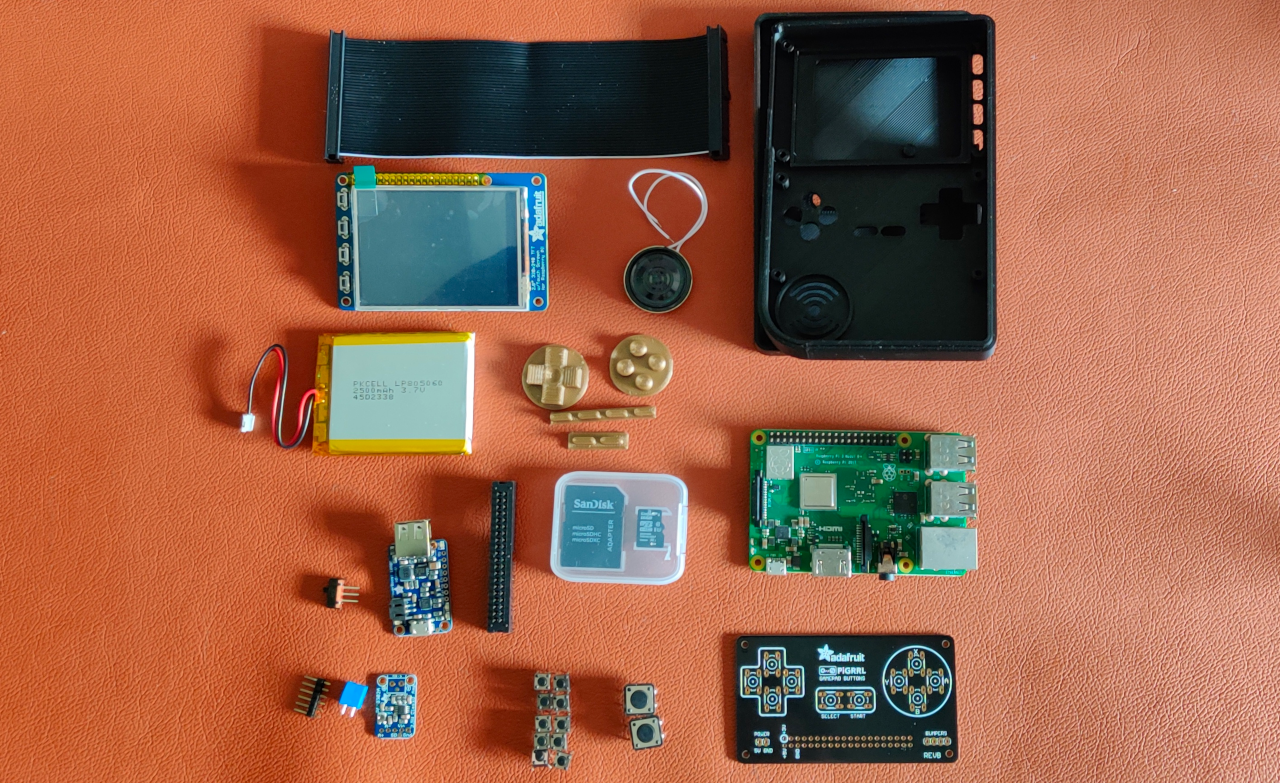
The Components
The kit itself comes with most parts you need to build the project. The only things I still had to find were a battery and a Raspberry Pi. After 15 hours of printing, I also had all the printed parts to start on the build.
The Build
It’s been a while since I heated up my soldering iron. And it reminded me again to put a proper solder station on my wish list. I don’t really have a proper workbench with all the fancy engineering tools. But I do have a cheap soldering iron from a local DIY store, some cardboard to protect my desk, and duct tape to keep things in place if I need them to.
The kit required quite a bit of soldering and I definitely think this was the biggest project I’ve done up until now. I used stiffer wires with caused a lot of them to break off when I was jamming everything in the case. After a good 10 hours of soldering, cursing, and testing. It was finally done! Something I skipped in the instructions was that a default Raspbian install needs a few more tweaks you should do on another screen before it works with the PiTFT screen. Otherwise, you’ll get a blank white screen. Trust me, I wasted 2 hours thinking I had wired something in the wrong way or that I had a bad joint somewhere. At least this way my multi-meter gets used.
Software
The PiGrrl manual expects you to run RetroPi. Install was an absolute breeze. There were 2 extra scripts you had to run to configure the TFT screen correctly and to make the keys work but after that, it works like a charm. I found some of my favourite games from my childhood and played them until I fell asleep.
Review
I really enjoyed building the kit. It was a bit at the edge of my comfort level. I had soldered before, but this time it was a lot. One of the steps also asks you to solder some wires to the pi directly which was definitely be a first for me. I was a bit scared that I would build the kit and it would start gathering dust soon after. But I can say that in the past few days I’ve already been playing for a couple of hours.
Future Plans
It’s fun playing games on the retro pi but the device has a lot more potential. I’ve been looking for a DIY desk buddy to show me weather notifications, meeting reminders, and some random trivia during the day and I think the PiGrrl could be a great form factor for it.
I also think it could be an awesome remote for a drone or a robot. Certainly on the lookout for a project like that.
The Hardware itself also could use some upgrades. I’ve done a bit of research and there are already some very cool mods out there. For example, a charging light to notify you when the battery is getting low, a potentiometer to control the audio, or ditching the speaker altogether in favour of a headphone jack.
Me, personally, I would like to switch the default tactile buttons with some softer membrane ones because you can feel the strain after a while of playing games. I also still have a lot of interference on the speaker, especially when it is not playing any audio. I already played with the screen frequency and with the amp. But it’s still quite noticeable.
If you would have told 12 year old me when I got my first Gameboy Advance SP with Pokemon Sapphire on it that 24 year old me would be making his own Gameboy I probably would’ve thought that I’m the coolest person ever or that I should grow up. Anyway, I had a lot of fun making this project, I would definitely recommend it!